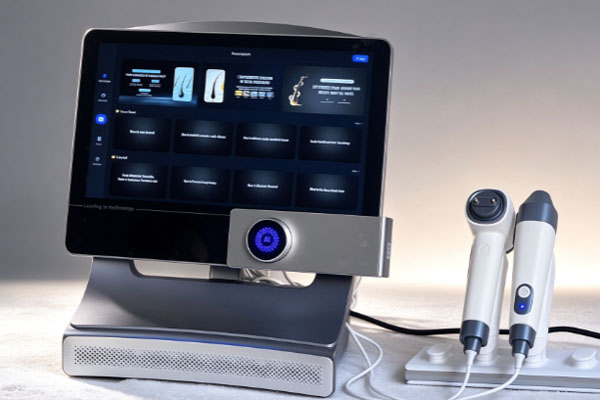
Hair analyzers are commonly used in scalp care, hair analysis, and professional beauty services. They are primarily used to magnify and observe visible features such as the scalp surface, follicular openings, hair condition, and scalp oil distribution. As a core component of image capture, the cleanliness, surface condition, and daily handling of the lens all affect image clarity and the overall testing experience. If oil, flakes, dust, or care product residue accumulates on the lens, captured images may appear blurry, reflective, or lacking in detail, which can affect observation results. Proper lens maintenance not only helps maintain stable image quality but also reduces lens wear, residue buildup, and equipment malfunctions. During daily use, choose suitable cleaning tools according to the device manual, and avoid inappropriate cleaning agents or direct contact with optical surfaces. Lens protection, equipment storage, cable inspection, and regular functional testing should also be included in routine maintenance procedures.
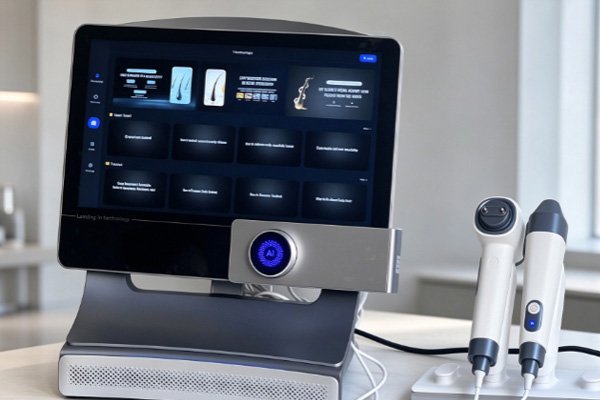
Proper Methods for Cleaning a Hair Analyzer Lens
Lens cleaning is one of the most important tasks in routine maintenance. When a hair analyzer is used in contact with or close to the scalp and hair, sebum, sweat, dandruff, and care product residue can easily accumulate around the lens. If these contaminants are not removed promptly, they may obstruct the observation area, reduce image contrast, and even scratch the lens surface during repeated wiping. Therefore, before cleaning, confirm the device structure and lens material, then follow the manufacturer’s operating instructions.
Prepare Before Cleaning
Turn off the device: Turn off the hair analyzer before cleaning and disconnect the power supply or charging connection as required by the manual to prevent accidental operation during cleaning.
Prepare suitable tools: Use a lens cleaning cloth, dust blower, or cleaning products recommended by the manufacturer for optical lenses. All tools must be clean and free of sand, hard particles, or other contaminants that could cause scratches.
Inspect the lens surface: Examine the lens under adequate lighting to determine whether dust, oil stains, fibers, or other residue is present. Remove loose particles before wiping to reduce friction-related damage.
Clean the Lens According to the Type of Contamination
For loose dust, prioritize using a dust blower suitable for optical surfaces. For light fingerprints or oil marks, gently wipe the lens with a clean lens cleaning cloth. If the device manual permits the use of a specialized optical cleaning solution, apply a small amount to the cleaning cloth first, then clean the lens according to the product instructions. Prevent liquid from entering the lens edges, connectors, or internal structures. Do not casually wipe the lens with tissues, rough fabrics, or clothing. Avoid using alcohol, strong solvents, or household cleaning products unless their suitability has been confirmed. Some lenses have special coatings that may be damaged by inappropriate chemicals. After cleaning, check the lens for residual fibers, liquid marks, or visible stains. Confirm that the lens is clean before turning the device back on.
How to Protect the Lens During Daily Use
Lens maintenance should not rely solely on cleaning after contamination occurs. Proper operating procedures can reduce the lens’s exposure to contaminants and lower the risk of impact, scratches, and damage to internal components. In locations with frequent equipment use, such as beauty salons and scalp care centers, operators should follow consistent equipment handling and cleaning procedures to avoid unnecessary wear caused by different operating habits.
Control Contact and Wiping Methods
When using a hair analyzer, observe the scalp according to the specified working distance and contact method. If the lens needs to contact the scalp, check whether the contact end has a dedicated protective structure, and clean or replace removable contact components according to the manufacturer’s requirements. The lens itself should not be subjected to unnecessary pressure and should not come into direct contact with fingernails, metal tools, or other hard objects. After each test, inspect the lens and contact end for oil, hair, or care product residue before performing appropriate cleaning. If the device comes with disposable protective covers or specialized isolation accessories, use them according to the instructions. Do not substitute covers that are incorrectly sized or may obstruct the optical path.
Protect Against Dust, Moisture, and Impact
Replace the lens cap promptly: When the device is not in use, fit the original or a compatible protective cap to reduce the accumulation of dust and fine fibers.
Choose a suitable storage location: Store the device in a dry, clean, well-ventilated area where it is unlikely to be knocked over or struck. Keep it away from sinks, steam-generating equipment, heat sources, and areas exposed to intense direct sunlight.
Avoid pulling cables: When moving the device, hold the main body or the designated grip specified by the manufacturer. Do not move the device by pulling the power cable, data cable, or probe cable.
Store accessories properly: Keep cleaning cloths, protective caps, and removable probes stored separately and securely. Avoid storing them together with hard tools such as scissors and tweezers.
If a hair analyzer needs to be moved between different treatment rooms, use a suitable storage case or protective packaging. Before transportation, confirm that the device is switched off and the lens protection components are properly installed. These precautions can effectively reduce the risk of damage caused by vibration and accidental impacts.
Maintenance Measures to Extend the Service Life of a Hair Analyzer
The service life of a hair analyzer depends not only on the condition of the lens but also on power management, heat dissipation, software operation, and accessory quality. Equipment used frequently over long periods should have a simple, practical maintenance routine to identify issues such as abnormal imaging, loose connections, and aging components promptly. Proper maintenance helps reduce unexpected failures and keeps the device operating more consistently during daily testing.
Establish a Regular Inspection Routine
Inspections should be scheduled according to equipment usage frequency and the manufacturer’s requirements. Equipment used frequently can be checked for external condition and lens cleanliness after each use. Cables, connectors, probe mounting structures, and the device housing should also be inspected regularly. The specific inspection interval should be based on the product manual and actual operating environment.
Lens and imaging inspection: Regularly capture images of a standard observation area to check whether images are clear, brightness is stable, and abnormal dark spots, blurring, or persistent reflections are present.
Power supply and connection inspection: Check cables for damage, connectors for looseness, and charging equipment for compliance with the manufacturer’s requirements. If abnormal heat, unusual odors, or unstable connections occur, stop using the device and contact a professional for inspection.
Device operation inspection: Check the lighting, magnification functions, image transmission, and associated software according to the manual. If image abnormalities persist, do not rely solely on repeatedly cleaning the lens to resolve the problem.
Maintenance records: Keep simple records of cleaning dates, fault symptoms, accessory replacements, and repair results to help determine whether problems recur.
Avoid Improper Operation and Unauthorized Repairs
When a hair analyzer produces blurry images, first check whether the lens surface is clean. Then confirm that the imaging distance, focus settings, lighting conditions, and software parameters are correct. If clear imaging cannot be restored after these basic checks, the optical components, sensor, or connecting parts may require further inspection.
Users should not casually disassemble the lens, adjust internal optical structures, or replace components with parts whose compatibility has not been confirmed. Such actions may compromise equipment sealing, cause optical misalignment, or even affect subsequent warranty coverage. For scratched lenses, liquid entering internal components, persistent imaging abnormalities, or devices that fail to start properly, contact the supplier or an authorized repair technician promptly.
Frequently Asked Questions
Q1: How often should a hair analyzer lens be cleaned?
Answer: It is recommended to inspect the lens after every use and clean it promptly according to the type and extent of contamination. If the device comes into direct contact with the scalp or is likely to encounter oil, sweat, and care products during testing, clean it after each use and disinfect it when necessary, following the manual. Even if there are no obvious stains, inspect the lens regularly to prevent long-term dust accumulation. The specific cleaning methods and frequency should follow the equipment manufacturer’s requirements.
Q2: What should I do if scalp images remain blurry after cleaning the lens?
Answer: Check the lens surface, imaging distance, focus settings, lighting conditions, and software parameters in sequence. If images remain blurry after cleaning and the same problem occurs across different observation locations, the cause may involve the lens assembly, sensor, or connection components. Stop unnecessary disassembly and contact the supplier for inspection.
Q3: Can ordinary alcohol or tissues be used to clean the lens?
Answer: It is not recommended to use ordinary alcohol or tissues unless their suitability has been confirmed. Some lenses have special coatings that may be damaged by certain cleaning agents, while tissues may leave fibers or cause fine scratches. Prioritize optical cleaning tools and solutions recommended by the manufacturer, and follow the operating instructions in the product manual.
Q4: How can maintenance costs be reduced when purchasing a hair analyzer?
Answer: Before purchasing, check the lens material, protective structure, cleaning requirements, availability of replacement parts, and after-sales repair policies. It is also advisable to prioritize suppliers that provide clear operating instructions, convenient accessory replacement, and technical support.
Maintaining a hair analyzer lens requires a combination of routine cleaning, proper operation, environmental management, and regular inspections. Using tools suitable for optical lenses, avoiding inappropriate cleaning agents and scratches from hard objects, fitting the protective cap promptly, and storing the device in a dry, clean location away from potential impacts can reduce lens contamination and damage. Meanwhile, regularly checking image quality, power connections, probes, and related accessories helps identify potential faults at an early stage.
For beauty salons, scalp care centers, professional beauty equipment distributors, and equipment procurement companies, a well-established maintenance routine can improve equipment efficiency and reduce unnecessary repair costs. If you are purchasing a hair analyzer or need maintenance supplies for existing equipment, consider usage frequency, lens structure, cleaning requirements, and after-sales service when making your selection. Proper maintenance management helps preserve image quality and extend the equipment’s actual service life.